Supplies
Unbleached muslin
Felt
Yarn
Embroidery thread
Pencil or fabric marker
Pins
Instructions
Using the pattern below, cut out the pattern and then trace around it directly onto the wrong side of the fabric with pencil or disappearing fabric marker. Don't cut the fabric yet!

Pin the traced fabric to another piece of fabric, right sides facing each other.
Sew around your tracing, leaving an opening in the top of the head for stuffing.
Cut around the sewn doll, leaving just a little bit of fabric as a seam allowance.
Very carefully clip around the curves right up to the seam, without cutting the seam.
Turn the doll right side out so the seams are now on the inside.
Stuff the doll with fiberfill, then sew up the top of its head by hand.
Sewing hair
Make the yarn longer rather than shorter, though, because you can always cut it after it's attached.
Some doll hair tutorials:
How to knot on yarn doll wigs.
Make a little wig. This one is pretty easy to adapt to all doll head sizes.
Local public libraries have plenty of books on cloth doll making. There are a lot of tips in these.
Embroidering
The author suggests embroidering the face before sewing, because, if a mistake is made, it would be better to do it on fabric that can be replaced, rather than having to replace an entire doll.
Here is an online dictionary of embroidery stitches.
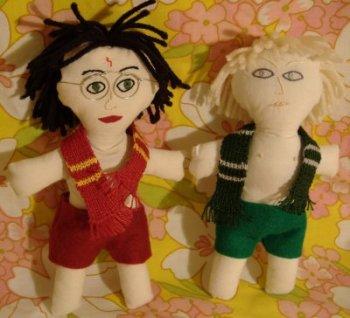
Final Product
Credit
Aliciajoy's tutorial was taken with permission from sockmonkeyrescue.org.